Showing posts with label decoupage. Show all posts

Saturday, December 29, 2012

2012 Wrap-Up - 10 Most Popular Posts!

I like having Christmas behind me.  Not that I don't love the day, but sometimes it seems like such a production that I hardly get to relax and enjoy it.  Maybe that means I've become an adult and maybe it means that I'm a procrastinator and I was finishing up someone's Christmas stocking on the afternoon of the 24th.  Either way I do enjoy that last week of the year when we have no plans or obligations.  No school or work.  It's a good time to think about what we've done over the whole year.
Here's a rundown of the most visited posts of the last 12 months!

1.  Lotion Bottle Cellphone Holder!


This one was a first for me - first Pinterest project, first ModPodge project...


2.  Improved Kitchen Storage!


A quick & dirty fix for a most annoying problem - storage of cookie sheets and trays!


3.  Finally!  A Lamp Refurb!!!


This was a most delayed project - and I was so glad to have it done.  

4.  Check out my Can!!


This was a super easy project that I'm sure I'll be repeating.  Seriously, there's something very satisfying about watching glue dry.

5.  It's Curtains for You (or me actually)!!


A post where I confess to having no pretty window treatments in my bedroom after living here for 5 years.


6.  Getting my Mod Podge on!


I still sorta miss this shirt...

7.  Things are looking UP!


I think this should probably be considered phase 1 of the big-girl-bedroom redo... 


8.  Snowflake Ornament


This was seriously fun.  I may do another ornament next year.  Or I may just post the second one I did already ;)

9.  Halloween Felt Board


The kids really enjoyed it, but it didn't last... Mr. Destruction had it ripped off the wall within 2 days.  Next time I will figure out a more secure way to attach it.

10.  Make It BLUE!


A recent post about repainting the dining room.


So that's it!  The top 10 most popular posts of 2012.  I'm already excited about 2013 :)


signature

Tuesday, July 24, 2012

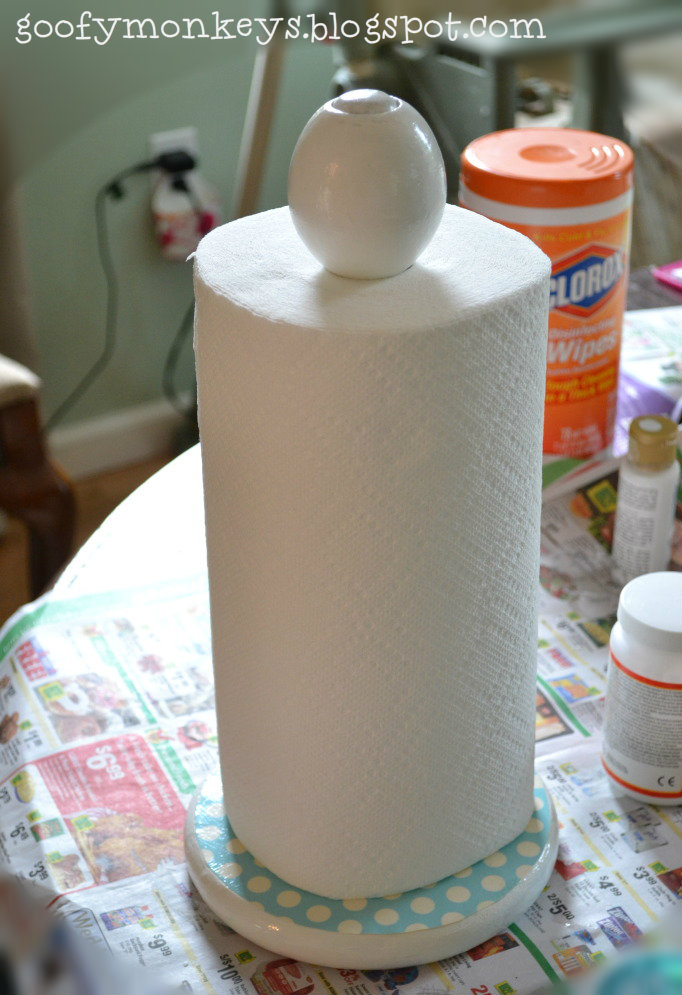
Mod Podged Paper Towel Holder

Sometimes I just wander around my house looking at things I have and wondering if there's something I already have that could use some improvement to bring some style and color into my life or to see something I might otherwise throw away and see if I can rejuvenate it.  It was one such stroll around the house that I spotted this little gem:


This thing was purchased at Walmart (I think) in about 2003 when Jason moved from Massachusetts into a tiny apartment in West Nowhere, PA.  It made it to our apartment when we got married and then to our house when we bought it.  It's not UN-attractive, but not terribly interesting.  It's sort of a function over form sort of thing.  I've actually been planning on getting a new one at some point, but until then I could at least make THIS one look more interesting.

A simple/quick makeover was in order - paint & Mod Podge. Very easy.

I started off by disassembling the whole thing and wiping it down to make sure it was nice and clean.

Then I did a few coats of white craft paint which I already had (costs about $1 per bottle at Michael's).

I made a plain paper template (to get the size right) and then traced it onto a piece of scrapboook paper (about $0.69).


After cutting out the circle, I was ready to get my Mod Podge on!


I applied a layer of Mod Podge then paid the circle on top. I added a topcoat of Mod Podge, trying to keep it smooth and even.

I followed up with a few coats of the Podge, allowing each coat to dry for about an hour.


Then BLAM! Done :)


I think it's a little snazzier than it used to be.  I'm not sure this is a "forever" paper towel holder, but it's better than what it once was.
DIY Show Off

Monday, April 16, 2012

Getting my Mod Podge on!

Wow - it's had been a while since I Mod Podged something and I was itching to give it a go again!

This time around I was inspired by this pin on Pinterest, which links to a fun project over on Tatertots & Jello.  Basically it's a wipe container (you know those Clorox/Lysol wipes - great for kitchen/bathroom quick clean-ups) that has fabric or paper applied to the outside.  And what do you know, I just used my last wipe the other day and the empty container was sitting out in the recycling bin!!

Since the top of the container was yellow I looked for something yellow to use as the cover.  I chose an old favorite shirt of mine.  It's fun, it's gorgeous, but I bought it before my oldest child was born so it really doesn't need to be in my regular rotation anymore.

Step one is clean-up - I removed the label from the outside of the container and used some Goo Gone to get rid of any remaining stickiness.


Next up, trimming my fabric.  I admit that cutting up this shirt did give me a few pangs of sadness (I really liked this shirt), but it's ok.  I liked the detailing along the hem so I decided to keep the hem and make it the bottom edge of the container.

Next is applying the fabric.  Using old fashioned glossy finish Mod Podge, I painted on a good thick layer and carefully applied the fabric on top and then paint Mod Podge over the fabric, being careful not to create bubbles, wrinkles or shifting the fabric around too much.


I only did about a 2" wide strip at a time and letting it dry before continuing.


I continued all the way around until I got to the seam.  For the seam I trimmed excess fabric, turned the edge under and glued it in place with Mod Podge, then let the whole thing dry.  I put it upside down on top of a soda bottle.

I did a full coat of Mod Podge over the whole thing, let it dry, then did another coat and let it dry.  So that's probably 3 coats over the whole thing.  I could do more because I enjoy painting the stuff on.

After I was happy with it, I trimmed some excess fabric at the top.


And that's it!


I'm not sure what I'll use it for.  The original project suggests using it as a plastic bag dispenser (and includes directions for how to roll up the bags), but I keep thinking up other uses.  Storage for markers, trash receptacle for the car, small toy storage, etc.


What would you do with it??


Monday, March 26, 2012

Egg-citing Craft Time (oh yeah)

Sorry about the title.  Skipping an egg related pun for an Easter craft would be a wasted opportunity.

With Easter right around the corner and a recent affection for Mod Podge I decided to give some eggs a whirl.


Now I guess you could use actual eggs to do this (draining the innerds first), but I decided to use craft eggs made from paper mache.  Again, I decided to dive into the old clothes bags to find some materials to cover the eggs - seeing as we have tons of funky and bright clothes from Sarah.

My first try was a bit of a bust, but I'll chalk it up to "learning".  I learned that I do need to go a little slower to minimize wrinkles and avoid accidentally cutting things too small.  I also learned that I should paint the eggs white before trying to apply the fabric.  The unpainted eggs are cardboard colored and the result without painting them first is sort of dark & drab rather than bright.


So step 1 is painting the eggs.  I used white acrylic craft paint and let them dry a bit.


Then I picked some old clothes in nice patterns that would work for eggs.

I cut out pieces wide enough to wrap around the egg at the widest point and long enough go end to end.  And I just started putting it on with Mod Podge.  I 'Podged up a smallish area, pressed on the fabric little by little.  With the round eggular shape, it was impossible to get it totally flat, but using scissors to slit down and overlapping flaps, I managed to avoid wrinkles.   Well, most wrinkles.


This step took quite a while because I let one side dry before starting the other side.

After the fabric was glued down all over, I went over the whole egg with a coat of Mod Podge.


The dry time for each layer was at least an hour.  It took a few days to get these done.


I did five eggs in different papers/fabrics.


What do you think?


DIY Show Off

Sunday, March 25, 2012

Check out my Can

As beautiful as last week was, this weekend has been equally dreary.  On one hand, I really missed the sun and was sad to have drizzle, clouds, and some fog, but on the other hand, it did give us some nice inside time.  Inside time = time to work on projects :)

I had a few projects in mind and a few already begun (you'll see that later this week), but in the meantime I was able to bang out something else.  Quick, easy & cheap!

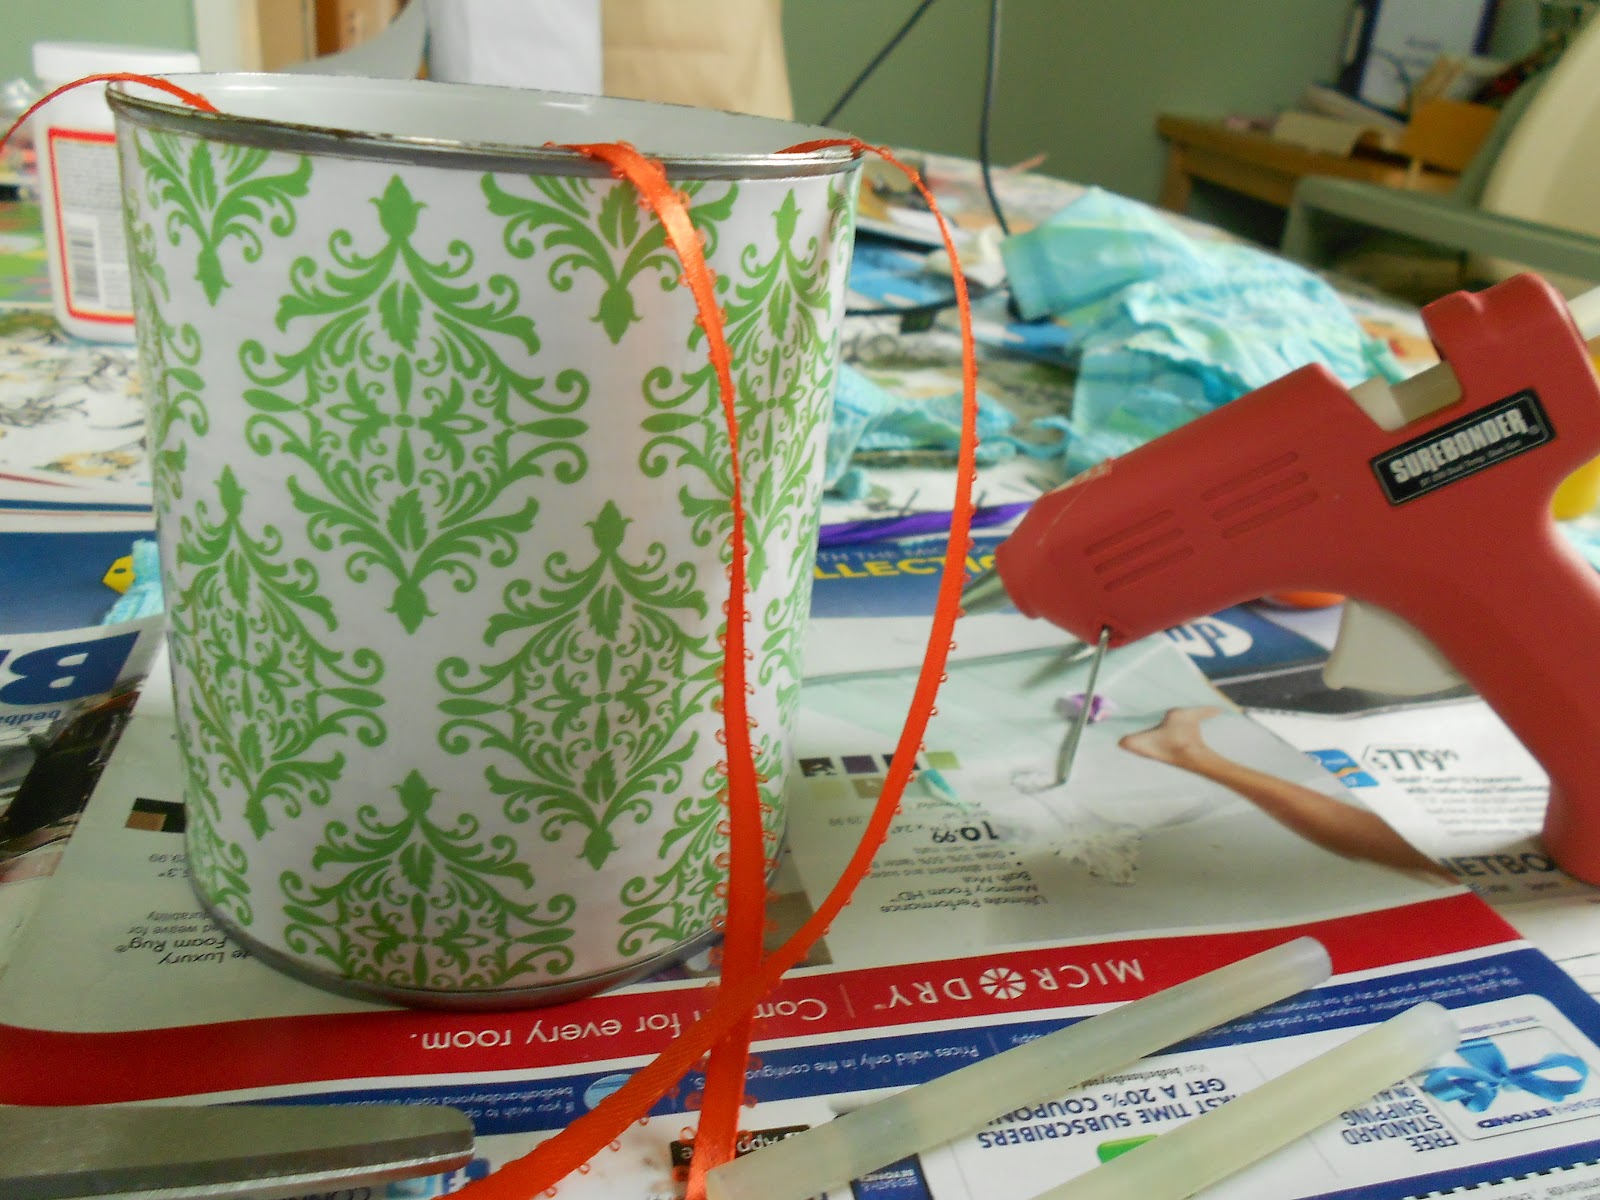
Yep, a can.  A Mod Podged pretty tin can.  So cheap, so easy, I'm almost embarrassed to consider this a tutorial of any kind, but whatever.  I figure if a thousand other bloggers can post about their Mod Podged cans, then so can I.

I had an empty can from making chicken enchiladas earlier this week.  So step one is removing the label and thoroughly washing and drying the can.

Then I painted the outside white. I'm not sure how necessary this was because some of the paint peeled off while I was applying the paper, but I really wanted bright colors, so I painted it with some white acrylic craft paint that I already had.  I didn't take a picture of this, but I'm sure you guys can probably guess what it looks like.

After leaving the paint to dry - maybe an hour or so? - I cut a piece of scrapbook paper to be the height of my can.  It took a few tries of trimming down so that the paper would fit nicely between the top and bottom ridges of the can.

I brushed on a thick-ish layer of Mod Podge to the can and applied the paper.  I had to adjust the paper a few times to get it straight, but it was fairly straight forward.  Because the can was bigger around than a 12" piece of scrapbook paper, I cut out a little strip of paper to bridge the gap.  No matter, it'll be in the back :).  Another layer of Mod Podge over the whole thing and I left it to dry.  This drying time took quite a while with the 'Podge under AND over the paper.


Wait, wait, wait...watched a few episodes of Lost, had a bowl of ice cream, walk the dog...

After it dried, I admired my work and put on a second coat of Mod Podge.  I'm not sure if needed it, but I like painting the stuff on, so it got a second coat.

Then, the next day I rooted through my bag of tricks and found some orange ribbon to finish it off.  It came from Grandma Connie's 90th birthday party (it was used to tie the bags of M&Ms closed).


Using my handy-dandy hot glue gun, I attached the ribbon all the way around the bottom and top edges of the can, covering up the exposed ridges.


I made sure that the ribbon ends met at the back - where the patch of paper is.

Using the excess ribbon, I tied a tiny bow and attached it to the front.


And that's it!


Budget breakdown:

  • Can - free
  • Ribbon - free (because I'm a scavenger)
  • Glue - free (had it)
  • Mod Podge - free (had it)
  • Paper - $0.59

Total:  $0.59!!!

And now I have this pretty little storage container that sits in my hall closet.  It's holding my brushes so that I can always find them.  And it makes me smile when I see it.  Even spaces behind closed doors can be pretty, right?


Linked Up:

The Shabby Nest

Wednesday, March 14, 2012

Lotion Bottle Cell Phone Holder

If you're here because of the Pinterest Challenge then WELCOME!!!

If you don't know what Pinterest is, then you should head back to THIS post and read up.  And then you'll maybe start to understand what this post is all about.

I follow a handful of different blogs, some about families, some about DIY and home improvement, some about nothing.  Last week TWO of the blogs I follow announced a Pinterest Challenge where their followers were invited to take something they've pinned and DO it.  I have a ton of crafts, DIY ideas, etc. and this is a reason to pick something I've had my eye on for a while.

I chose a small project (since I wanted to make sure I could easily tackle it).  I picked this fun project that I had pinned (check this project out on Pinterest):


You can find the original blogger's project here.  I honestly don't remember how I stumbled upon this, but I thought it was so cool and fun.  So I went for it!

Using an old Target lotion bottle and an old dress of Sarah's that I pulled out of the Goodwill pile, I got to work.  The original project bog shows some great step by step photos, so be a little quicker.

I started by peeling labels off the bottle and thoroughly washing the bottle inside and out.

I used a little Goo Gone to remove some leftover adhesive on the bottle

Using a silver sharpie I sketched out the line to cut out my handy-dandy holder.  I did that using regular scissors.  I traced the outlet hole from an outlet cover I had.

I sanded down the edges to make them smooth, and roughed up the outside of the bottle with a bit of sandpaper.


I played around with the fabric from the dress so that I'd find the right part of the pattern to be front and center and using Mod Podge, I painted the bottle and applied the fabric.

Now this is my very first Mod Podge project, so I'm not sure if this is the "right" way, but I applied the fabric all the way around, let it dry, trimmed it with scissors, then Mod Podged over it.  This was the point where I wrapped the fabric over the bottom of the bottle.

I cut an oval of fabric to make the bottom look neat and added a few more coats of Mod Podge over the whole thing, letting it dry hanging on a knife in a glass between each coat.


When it was all but done, I used a drill with a tiny bit to drill the hole where I can attach it to the outlet cover.


What's the difference between my project and my inspiration?  Well, the original project has a wide hole for the plug and the holder hangs on the AC adapter block.  This wouldn't work for us because our phones & camera have these ENORMOUS AC adapter blocks.  So instead of letting the holder hang on the prongs sticking into the wall (this seemed dangerous), I planned on having the holder screw into the wall and being a more permanent fixture.


I did have one design flaw - I should have made the back of the holder longer so the plug would sit well above the phone/camera.  This way I'll have to plug the phone into the top outlet.  It's still neater than putting the phone on the floor or windowsill.

I'm pleased with how it turned out, but moreover I think I fell in love with Mod Podge!  I've got big plans.  Huge, really.  I'm going to decoupage every surface in my whole house!  Well not quite that much, but I expect to have some funky projects coming up!

Big HUGE thanks to the peeps who organized this:

What a great way to get all our creative juices flowing!

LinkWithin

Related Posts Plugin for WordPress, Blogger...