
Yep, a can. A Mod Podged pretty tin can. So cheap, so easy, I'm almost embarrassed to consider this a tutorial of any kind, but whatever. I figure if a thousand other bloggers can post about their Mod Podged cans, then so can I.
I had an empty can from making chicken enchiladas earlier this week. So step one is removing the label and thoroughly washing and drying the can.
Then I painted the outside white. I'm not sure how necessary this was because some of the paint peeled off while I was applying the paper, but I really wanted bright colors, so I painted it with some white acrylic craft paint that I already had. I didn't take a picture of this, but I'm sure you guys can probably guess what it looks like.
After leaving the paint to dry - maybe an hour or so? - I cut a piece of scrapbook paper to be the height of my can. It took a few tries of trimming down so that the paper would fit nicely between the top and bottom ridges of the can.
I brushed on a thick-ish layer of Mod Podge to the can and applied the paper. I had to adjust the paper a few times to get it straight, but it was fairly straight forward. Because the can was bigger around than a 12" piece of scrapbook paper, I cut out a little strip of paper to bridge the gap. No matter, it'll be in the back :). Another layer of Mod Podge over the whole thing and I left it to dry. This drying time took quite a while with the 'Podge under AND over the paper.

Wait, wait, wait...watched a few episodes of Lost, had a bowl of ice cream, walk the dog...
After it dried, I admired my work and put on a second coat of Mod Podge. I'm not sure if needed it, but I like painting the stuff on, so it got a second coat.
Then, the next day I rooted through my bag of tricks and found some orange ribbon to finish it off. It came from Grandma Connie's 90th birthday party (it was used to tie the bags of M&Ms closed).
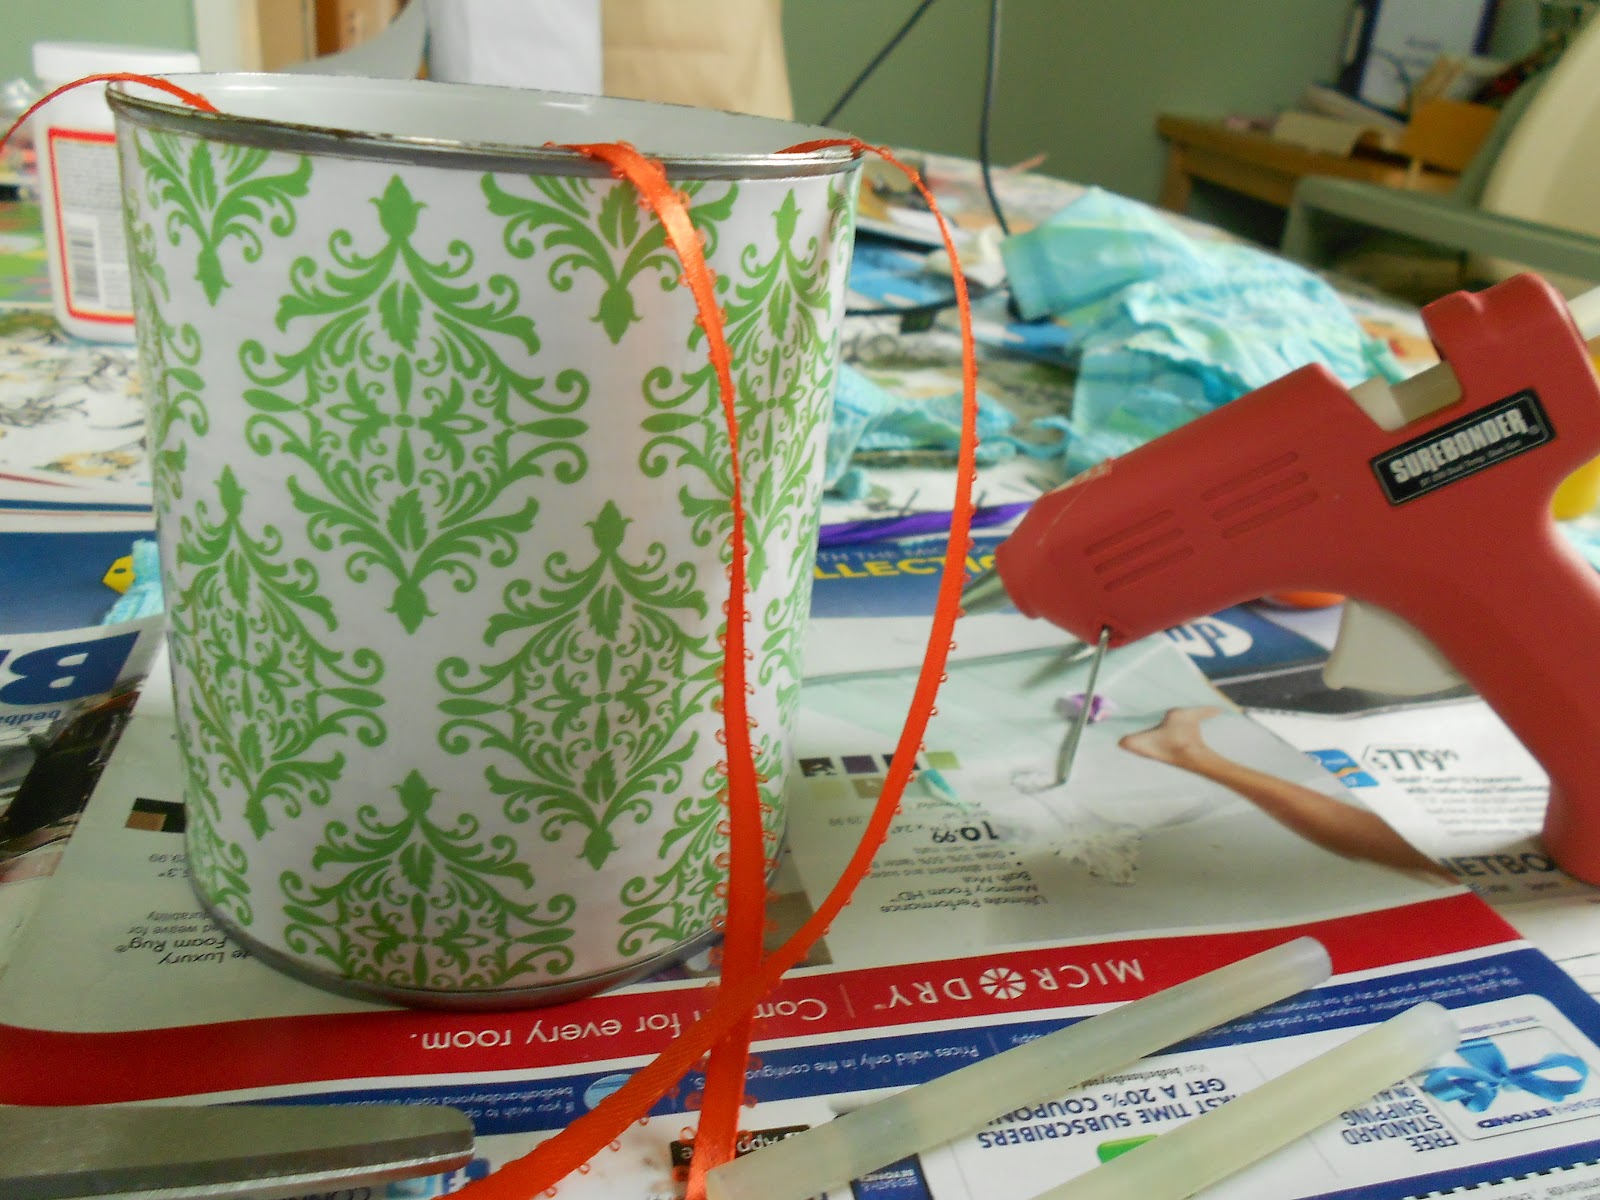
Using my handy-dandy hot glue gun, I attached the ribbon all the way around the bottom and top edges of the can, covering up the exposed ridges.

I made sure that the ribbon ends met at the back - where the patch of paper is.
Using the excess ribbon, I tied a tiny bow and attached it to the front.

And that's it!

Budget breakdown:
- Can - free
- Ribbon - free (because I'm a scavenger)
- Glue - free (had it)
- Mod Podge - free (had it)
- Paper - $0.59
Total: $0.59!!!
And now I have this pretty little storage container that sits in my hall closet. It's holding my brushes so that I can always find them. And it makes me smile when I see it. Even spaces behind closed doors can be pretty, right?

Linked Up:

Love it! Covering cans and old boxes is one of the most fun and rewarding organizing DIY project! Job well done!
ReplyDeletexoxo,
Jen
Thanks Jen! It was fun & my daughter wants to get into it too.
Delete