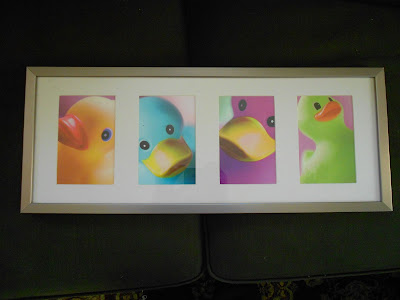
It's a little generous to call this a "project", but this has been waiting for years to get done. Hanging rubber ducky pictures in our bathroom. It's so simple that it's embarrassing that I haven't done it yet. There have just been other things that were higher on the list of things to do.
I'll give a rundown of what I got and where:
Set of 5 rubber duckie art cards - $5 - Ikea no longer has the ducks, but this set is pretty cool
Four photo brushed metal frame - $10 - Homegoods (love that place!!)
So the grand total here is $15. So simple.
I picked my four favorite ducks and stuck them to the matte with some tape on the back, popped it into the frame and it was ready to go! And then it got put in the bathroom closet for like 3 years. In my defense, the whole thing was purchased and planned before we renovated the upstairs bathroom, so a whole DIY bathroom reno (which we did very slowly) was part of the 3 year wait.
I had considered using a 3M Command hook to hang this, but with the steam in the bathroom, I was concerned that it wouldn't hold and we'd have a busted frame, broken glass, and ducks on the floor with the first super hot shower.
On the back side of the frame there are a few little rings to be used for hanging (one for vertical, two for horizontal).
I thought about adding a picture wire to the back (allowing for a single hook) but the rings were too close to the top edge and the wire would have shown. So I went with plain old picture hooks.
I held up the frame where I wanted it, used the level to make sure it was nice and straight and then used a pencil to draw a nice line.
Then I marked the top of the frame where the loops were, so that I'd be able to mark for the hooks without actually measuring anything. I think it's good to mention here that the tape measure was back downstairs and I'm lazy. So here you can see where I marked, sorta.
And it's the top of the frame so even if it didn't erase, you wouldn't be able to see anything.
Holding the frame UPSIDE DOWN at the line I marked earlier and I made two little dots signifying where I was going to put the hooks. I basically eyeballed that the frame was left/right centered when I did it. I popped a few standard picture hooks into the wall and up she went!
 |
| It looks much better on the wall than it did in the closet, right? |
 |
| Here you can see the wall is between the window and the tub. Please excuse our messy towels. |
Bingo, bongo, doneskies!!
It feels good to have this checked off the list. What shall I do next week?


